








Preparing the subfloor for underfloor heating: levelling, priming and checks
How to get a concrete, screed or timber subfloor ready for water or electric underfloor heating: how flat it must be (SR1, 3mm under 2m), how to check it, cleaning and repairs, priming, levelling compounds, timber overboarding and moisture limits.
Short answer: Before any underfloor heating goes down, the subfloor must be sound, clean, dry and flat. For a tiled finish, aim for SR1: no more than a 3mm gap under a 2m straightedge. Scrape off mortar, plaster and old adhesive, fill cracks, prime the surface to suit the primer maker's instructions, and level any dips with a compound. Concrete and screed should read below 75% RH before levelling or floor finishes. Timber floors must be rigid; a common fix is 15mm exterior plywood screwed at 300mm centres.
Most underfloor heating problems that show up after the floor is finished started before the first board went down. A hump in the slab rocks an overlay board and cracks the tiles. Dust stops self-adhesive panels sticking. A damp screed ruins a wood floor. Prep is the cheapest part of the job and the hardest to fix later.
This guide covers the checks and fixes for concrete, screed and timber subfloors, for both water and electric systems. It sets out how flat the floor needs to be, how to measure it, when to prime, how to level, and what the building should be like before work starts. For the whole retrofit picture, see our guide to retrofitting underfloor heating.
What does preparing a subfloor for underfloor heating involve?
Five checks: is it sound, clean, flat, dry, and protected from damp from below. Work through them in that order, because each fix can affect the next.
| Check | What you are looking for | Usual fix |
|---|---|---|
| Sound | No loose, hollow or crumbling areas, no moving boards | Break out and repair, refix or overlay timber |
| Clean | No dust, mortar, plaster, paint, oil or old adhesive | Scrape, grind, vacuum |
| Flat | No gaps over 3mm under a 2m straightedge for tiles | Levelling compound or grind high spots |
| Dry | Concrete or screed below 75% RH | More drying time, then retest |
| Damp-proofed | A working DPM on ground floors | Add a DPM before insulation |
One manufacturer's solid floor guide sums up the starting point for a screeded system: the building secured against the weather, and a subfloor that is level, free from mortar or plaster residues and swept clean.
How flat does the floor need to be for underfloor heating?
For tiles, the Tile Association guidance asks for SR1: a maximum 3mm gap under a 2m straightedge. Boards and panels also need full, even support, or they rock and crack the finish above.
Board and screed systems put the same demand on the floor in a different way. One flowing screed maker's preparation guidance says insulation boards must be bedded on a flat surface and uniformly supported over their whole area, with any voids under them filled with grit sand. One manufacturer says a single layer of insulation is only enough where the concrete is even and free of other services. It puts the share of new buildings that need a double layer of insulation, to bring the floor up level over services on the slab, at about 90%.
Low-profile overlay boards and electric mats leave even less room for error, because there is no thick screed to take out the dips. Our guide to installing overlay boards covers the board side of this.
How do I check if my floor is flat enough?
Lay a 2m straightedge on the floor under its own weight and measure the biggest gap under it with a slip gauge or graduated wedge. This is the method BS 8204-2 uses.
- Clean the floor first so grit does not lift the straightedge.
- Check in several directions: along the room, across it and on both diagonals.
- Mark the high and low spots in chalk as you go.
- Record the biggest gap. Anything over 3mm needs attention under tiles.
- Check the doorways. Threshold levels limit how much you can build up.
Rule of thumb: grind humps, fill hollows. A levelling compound fills the low spots, but it cannot take a high spot down.
How do I prepare a concrete or screed floor?
Strip it back to a clean, sound surface, repair it, then prime. Levelling compound and adhesive stick to the surface they are laid on, so anything loose on top is a weak point.
- Remove contaminants. One adhesive maker's leveller data sheet lists dust, oil, grease, paint, plaster, polish, surface hardeners and adhesive residues as things that must be completely removed.
- Remove laitance. The same sheet asks for a floor free from laitance, the weak, powdery skin on new concrete and screed.
- Fill cracks and holes. Clean them out and fill with a repair mortar before levelling.
- Abrade calcium sulphate screeds. The Tile Association guidance asks for the surface of anhydrite (calcium sulphate) screeds to be abraded and then primed.
- Check the DPM. On a ground floor with no known DPM, put one in before the insulation. The flowing screed maker asks for at least 500 micron polythene, lapped 100mm, taped and turned 100mm up the walls. See our guide to DPMs and vapour barriers.
Do I need to prime the floor first?
Yes, before levelling compound, tile adhesive or self-adhesive panels. Primer controls how fast a porous floor sucks water out of the compound and gives a dense floor something to grip.
The right dilution depends on the floor, so always follow the primer maker's sheet. One maker's instructions for its leveller show how much it varies:
| Floor | Primer dilution (one maker's example) |
|---|---|
| Porous concrete or screed | 1 part primer to 2 parts water |
| Dense, non-porous surfaces | Undiluted |
| Calcium sulphate screed | 1:3, then a second coat at 1:1 once dry |
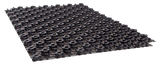
Self-adhesive egg crate panels such as MaxHeatSolo need a primed surface to stick. We stock Ultra Prime IT multi surface primer in 5 litre containers. Follow Ultra TileFix's instructions for your surface and drying times.
Design your UFH system yourself in 3 minutes with MaxHeatUFH ProLoop and get an instant quick design and quote. Start your design
How do I level an uneven floor before underfloor heating?
Prime, then pour a levelling compound to the depth the maker allows, and let it cure before fixing anything to it. Check the maker's limits for thickness, substrate and heating.
Taking one maker's deep leveller as an example of what a data sheet tells you:
- Depth: 5 to 50mm in one application, but no more than 10mm in total on calcium sulphate screeds.
- Light foot traffic: about 90 minutes at 20°C for a 5mm layer.
- Ceramic tiles: about 3 to 4 hours for layers under 10mm, at least 24 hours over 10mm.
- Existing underfloor heating: switch it off 48 hours before, during and for 48 hours after application, and keep the surface below 27°C.
- Not suitable over wooden floors or existing adhesive residues.
Compounds and levellers vary a lot, so read the sheet for the product you use. Our adhesives and primers range covers primers and bonding products for UFH jobs. For electric systems, our guide to adhesives, levelling and decoupling for electric UFH covers the layers over the mat.
How do I prepare a timber floor for underfloor heating?
Make it rigid first. Any flex in floorboards or chipboard will crack tiles and can work fixings loose over a heating board or mat.
- Refix loose boards. Screw them down to the joists rather than nailing.
- Stop the flex. One tile adhesive maker's guidance says timber floors should be supported well enough to prevent flexing, and that extra noggins may be needed.
- Overlay if tiling. The same guidance uses exterior or Class 3 plywood at least 15mm thick, with cut edges and the underside sealed, screwed (not nailed) at 300mm centres. A floor-grade tile backer board fixed to its maker's instructions is the alternative.
- Keep the void ventilated. Timber moves with humidity, and the guidance asks for adequate ventilation beneath.
- Do not pour standard levellers on timber unless the product is made for it. One deep leveller, for example, is not suitable over wooden floors.
If you are fitting water UFH between or on the joists instead of on top of the boards, see our guide to underfloor heating on joisted floors.
How dry does the floor need to be?
Below 75% RH for most levellers and floor finishes, measured with a hygrometer. That same leveller asks for a subfloor under 75% RH, and LABC Warranty's manual asks for the same figure on heated screeds before floor finishes, with the heating off for 96 hours before the test.
New screeds take time. The Tile Association guidance allows at least 3 weeks for a cement and sand screed after 3 days of curing, at 20°C and 65% RH, and says much longer is needed in cool conditions. Do not use the underfloor heating to speed up the drying of a new screed. Our guide to screed depth and drying time has the full timelines.
Frequently asked questions
How level does a floor need to be for underfloor heating?
For tiles, SR1: no more than a 3mm gap under a 2m straightedge. Boards and panels must also be fully supported, with no rocking or hollows underneath.
Do I need to level the floor before laying an electric heating mat?
Yes, if it is out of flat. Level and prime first, lay the insulation board and mat, then cover the mat with the adhesive or levelling layer the mat maker specifies.
Can I lay underfloor heating on old floor tiles?
Only if they are firmly bonded, clean and flat. Tap them to find hollow ones, remove any loose tiles, fill the gaps and use a primer made for dense, non-porous surfaces.
Can I lay underfloor heating over old adhesive residue?
Remove it first. Levelling compound makers list adhesive residues as a contaminant that must be fully removed before levelling.
What primer do I use on an anhydrite screed?
Abrade the surface, then use a primer approved for calcium sulphate screeds at the maker's dilution. One maker uses a weaker first coat and a stronger second coat on these screeds.
Should floorboards be overboarded before underfloor heating?
For a tiled finish, usually yes. A common specification is 15mm exterior or Class 3 plywood, sealed and screwed at 300mm centres, or a floor-grade tile backer board.
How long should a new screed dry before UFH boards go on top?
At least 3 weeks for a cement and sand screed in good drying conditions, and longer in cold weather. Test with a hygrometer and wait for 75% RH or below.
Sources: The Tile Association: guidance on the use of adhesives, SMD technical guidance: surface flatness (BS 8204-2 method), LABC Warranty Technical Manual, Section 4 Ground Floors
Products in this guide
Watch how each part works and how to fit it, and download its data sheet and install manual.



Every data sheet and manual: Product Library · All videos: MaxHeatUFH on YouTube

Design it in MaxHeatUFH ProLoop
Add your rooms, choose screed, overlay, joisted or electric, and get a free quick design and full kit list with prices.


