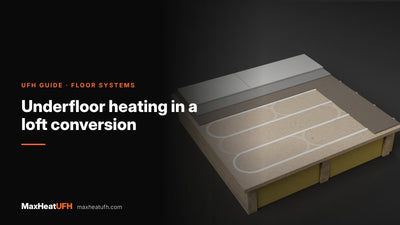
How to install overlay underfloor heating boards over an existing floor
How to fit low-profile overlay UFH boards over concrete or timber: checking the base, priming, bonding and screwing boards, laying pipe, testing and tiling.
Short answer: Make sure the existing floor is sound, dry and flat to within about 3mm under a 2m straightedge, then prime it. Bond the overlay boards down in a brick pattern, in a thin bed of flexible tile adhesive on concrete or screed, or screwed at about 300mm centres with washers on timber, leaving a 6mm gap at the walls. Press the pipe into the grooves, pressure test, then finish: tile direct only onto boards made for it, using flexible adhesive, or lay a cover board first for carpet and vinyl.
Overlay boards are thin insulation panels with the pipe grooves already cut. They go on top of an existing floor, so you get water underfloor heating without digging out a slab or waiting weeks for a screed. They are the usual choice for retrofits, kitchens and bathrooms where you can only lose a few centimetres of height.
Most overlay failures come from the floor underneath, not the boards. A floor that flexes, is out of flat or is damp will crack tiles however well the boards are laid. This guide takes you through checking the base, fixing the boards, laying the pipe and finishing the floor. For heights and board choice in more depth, see our guide to low-profile overlay underfloor heating.
Which overlay board should I use?
Pick the board by pipe size and finish. Tile-direct boards have a hard face for adhesive; foil-faced boards spread heat well but suit floating finishes or a cover board.
| Board | Thickness and pipe | Finish on top |
|---|---|---|
| MaxHeatPanel routed XPS | 18mm for 12mm pipe, 25mm for 16mm | Tile direct |
| MaxHeatDeck cement-faced XPS | 20mm for 16mm pipe, serpentine or straight grooves | Tile direct onto the cement face |
| MaxHeatFix | 15mm, 600 x 600mm, for 12mm pipe | Tile direct |
| MaxHeatFix Plus | 1200 x 600mm, for 16mm pipe | Check the finish with us |
| MaxHeatPro foil-faced EPS | 16mm for 12mm pipe, 20mm for 16mm | Foil spreads heat. Use with a suitable finish or cover board |
All the routed boards have grooves at 150mm centres. A MaxHeatFix pack of 10 covers 3.6m².
Is my existing floor suitable for overlay boards?
It is if it is solid, dry, rigid and flat. Check all four before you buy anything.
- Flat: the tested method published by Tile & Stone Journal works to SR1, no more than 3mm under a 2m straightedge. Level low spots with a suitable compound before the boards go down.
- Dry: the same guidance says pre-1970s concrete floors must have a damp proof membrane. Rising damp can make boards fail.
- Rigid: timber floors must not bounce. Screw loose boards down at about 300mm centres. The Tile Association suggests checking a timber base can carry the extra dead load of a tiled floor, up to 0.8kN/m², and stiffening with noggings or overlaying with backer board where needed.
- Clean: lift old carpet, vinyl and loose tiles. The Tile Association says bitumen products must be removed or overlaid.
Prime the base to suit the surface and the adhesive you will use. On timber, one adhesive maker primes with one coat of undiluted primer.
How do I fix overlay boards to the floor?
Bond them down, never float tile-direct boards loose. On concrete or screed, bed them in adhesive. On timber, prime, bed and screw them.
- Fit perimeter strip. Leave a 6mm gap round the room with a foam expansion strip, as one adhesive maker specifies.
- Set out the boards. Lay them in a brick bond pattern so joints do not line up. Plan the grooves so the loop runs to and from the manifold, and use plain board or plywood where there is no pipe, such as under kitchen units. One leading manufacturer uses 18mm plywood or chipboard for blanked-off areas.
- Concrete or screed: comb a thin bed of flexible tile adhesive onto the floor and press each board into it for full contact.
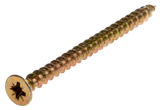
- Timber: prime, bed the boards in flexible adhesive to fill any voids, then screw at about 300mm centres with screws and washers, or to the board maker's pattern. Overlay washers spread the load so the screw does not pull through.
- Keep grooves clean. One leading manufacturer warns against getting adhesive in the pipe grooves.
How do I lay the pipe in overlay boards?
Press the pipe into the grooves from the manifold outwards, turning at the return ends, and keep each loop within its length limit. The pipe must sit fully in the groove.
- Loop length: One leading manufacturer limits 12mm overlay circuits to 80m and about 12m², and 15mm circuits to 100m and about 20m². Smaller pipe means more loops.
- Returns: serpentine or end-return boards turn the pipe back at the room edge. Straight-groove boards need return boards or cut returns.
- Bends: do not force the pipe tighter than the groove allows. A kinked loop must be replaced.
- Gaps: One leading manufacturer fills gaps, voids and pipe entry points with floor filler or grout before finishing.
Thin floors respond quickly, which is useful, but they also show uneven flows more. Balance the loops at commissioning so each room heats evenly.
Design your UFH system yourself in 3 minutes with MaxHeatUFH ProLoop and get an instant quick design and quote. Start your design
When do I pressure test an overlay floor?
After the pipe is in and connected to the manifold, and before any tiles, membrane or cover board go on. Once the floor is finished, a leak means lifting it.
Fill and purge every loop, test, and keep the record. Our guide to pressure testing underfloor heating sets out the method.
How do I finish over overlay boards?
Follow the board maker's list of approved finishes. Tile-direct boards take tiles in flexible adhesive. Other finishes may need a cover board or a floating underlay.
| Finish | What the guidance says |
|---|---|
| Ceramic and porcelain tiles | Flexible adhesive and grout. One adhesive maker recommends an uncoupling membrane on XPS boards, or 6 to 10mm of levelling compound as an alternative |
| Tiles on suspended timber | The Tile Association calls for a C2 S1 or S2 deformable adhesive |
| Large format tiles (600mm edge or more) | Solid bed with no voids. The Tile Association says avoid dot and dab |
| Laminate and engineered wood | Often laid floating direct on the boards. Check the board and floor maker's rules |
| Carpet and sheet vinyl | One leading manufacturer lays at least 10mm plywood or 6mm MDF over its boards first. Mark the pipe runs before stapling gripper |
Our guide to underfloor heating under tiles, LVT, laminate, wood and carpet covers tog values and surface limits for each finish.
When can I turn the heating on after tiling?
Wait for the adhesive to cure, then raise the temperature slowly. Turning the heat straight up is the quickest way to crack new tiles.
One adhesive maker allows 14 days after tiling before commissioning and then raises the floor temperature by about 5°C a day. The Tile Association gives 7 days for rapid-setting tile adhesive and 14 days for normal-setting adhesive. One leading manufacturer recommends a design flow temperature of 45 to 50°C for its overlay boards, so overlay floors usually run on a mixing valve or a heat pump's low flow temperature.
Products for this job
- MaxHeatPanel Routed XPS Board, Tile Direct
- MaxHeatDeck Cement-Faced Routed XPS Board
- MaxHeatFix Low Profile Panel, 12mm pipe
- Overlay Panel Washers (Pack of 100)
- All overlay boards
Frequently asked questions
Can I lay overlay underfloor heating on floorboards?
Yes, if the floor is rigid. Screw the boards down, prime, bed the overlay boards in flexible adhesive and screw them at about 300mm centres with washers. A bouncy floor needs stiffening first.
Do overlay boards need gluing down?
Tile-direct boards should be fully bonded to the base, in a thin bed of flexible tile adhesive on concrete, and bonded plus screwed on timber. Loose boards flex and crack tiles.
How flat does the floor need to be for overlay boards?
One adhesive maker's method works to no more than 3mm under a 2m straightedge. Level anything worse with a compound before you start.
Can I tile straight onto overlay boards?
Only onto boards made for it, such as cement-faced or tile-direct boards, using flexible adhesive. One adhesive maker recommends an uncoupling membrane on XPS boards.
Do I need insulation under overlay boards?
The board itself insulates, but on a cold uninsulated slab more heat goes down. Our guide to insulation under underfloor heating explains when to add more under the boards.
What flow temperature do overlay boards need?
Lower than radiators. One maker recommends a 45 to 50°C design flow temperature for its overlay system.
How long after tiling can I turn the heating on?
7 days for rapid-setting adhesive and 14 days for normal-setting, then raise the temperature slowly, about 5°C a day.
Sources: Tile & Stone Journal: tiling onto retro-fit water UFH boards, The Tile Association: tiling to heated floors, and manufacturers' installation guidance to BS EN 1264
Products in this guide
Watch how each part works and how to fit it, and download its data sheet and install manual.




Every data sheet and manual: Product Library · All videos: MaxHeatUFH on YouTube

Design it in MaxHeatUFH ProLoop
Add your rooms, choose screed, overlay, joisted or electric, and get a free quick design and full kit list with prices.