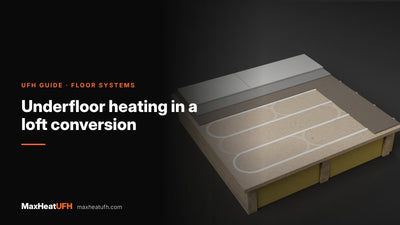
Screeding over underfloor heating: a checklist for you and your screeder
Everything to check before, during and after screeding over UFH: pipe fixing, pressure testing and keeping pressure on during the pour, edge strip and conduit, depths to agree in writing, the 21-day and 7-day waits, first heating steps and drying times before flooring.
Short answer: Before the screeder arrives: pipes fixed at their designed centres, system filled and pressure tested, pressure left on with the gauge visible, edge insulation strip fitted, and the depths agreed in writing. Afterwards: no heat for 21 days on sand and cement screed or 7 days on anhydrite, then a first heating that starts at 20 to 25°C flow for 3 days before stepping up. Budget drying at roughly 1mm of depth per day before floor coverings go down.
Screeding day is the point of no return for a wet underfloor heating system. Every pipe, clip and conduit disappears into the floor, and anything wrong underneath stays wrong. The screeder, meanwhile, is pricing and programming their own trade and will reasonably assume the UFH is ready unless told otherwise.
This checklist covers both sides: what the UFH installer must hand over, what to agree with the screeder, and the waiting and heating rules afterwards. It applies to traditional sand and cement screed and to flowing anhydrite and cementitious screeds, with the differences flagged where they matter.
What must be done before the screeder arrives?
- Pipes laid and fixed at the designed centres, with no kinks and clips or rail holding every run, so hoses and rakes cannot float the pipe during the pour.
- System filled, purged and pressure tested. Test before screeding and keep the pressure on during it; one manufacturer's commissioning guidance puts the test at 1.3 times the permissible operating pressure, with a written test record. Our guide to pressure testing UFH covers the procedure and paperwork.
- Pressure gauge visible on the manifold and the manifold valves closed off, so anyone on site can see at a glance that the system is holding.
- Edge insulation strip fitted around every wall and upstand, such as our edge insulation foam roll (from £10 inc VAT), to allow the heated screed to move; see why the edge strip matters.
- Conduit on pipe at doorways and joint positions, so pipes crossing a movement joint can flex, using pipe conduit on the tails as well where they rise to the manifold.
- Insulation and membrane complete under the pipe zone, with laps taped so flowing screed cannot leak through.
- Photos of every room taken on the day, with a tape in shot. The day the floor fails to warm years later, those photos are the as-laid drawing.
What should I agree with the screeder in writing?
- Depth and cover. State the total depth and the minimum cover over the pipe, and where the datum is taken from.
- Screed type and any additives, since drying times and first-heat rules follow the material.
- Who protects the pipe tails at the manifold during the pour.
- Movement joints: where they fall, and that pipes crossing them are sleeved; see screed expansion joints over UFH.
- That pressure stays on during the pour, and what happens if the gauge drops: stop, find it, fix it, retest.
- Aftercare: who ventilates when, and the earliest date heat may be applied.
How deep should screed be over underfloor heating pipe?
It depends on the screed type, and the screed manufacturer's specification always governs. As a sense of scale from published UFH system literature: traditional sand and cement systems are commonly based on around 65mm total over the pipe zone, while flowing screeds go much thinner, with one system datasheet recommending 35mm of cover over the pipe for roughly a 50mm total build-up on 15mm pipe. Thinner floors hold less heat and respond faster; our guide to screed depth and drying time goes deeper on the trade-offs.
Whatever the figure, get it in writing before the pour and check it during: a few trowel-test spots per room against the datum is a five-minute job that prevents the worst outcome, pipe with too little cover.
How long before the heating can be switched on?
Two different clocks run after the pour, and both must finish.
| Stage | Sand and cement screed | Anhydrite screed |
|---|---|---|
| Wait before any heat | 21 days after laying | 7 days after laying |
| First heating step | 20 to 25°C flow, held 3 days | 20 to 25°C flow, held 3 days |
| Second step | Maximum design flow, held 4 days | Maximum design flow, held 4 days |
Those waiting periods and the two-step first heating come from that EN 1264-based commissioning guidance, which also caps the screed temperature at the pipes at 55°C for cement and anhydrite screeds unless the screed maker says otherwise. Some system suppliers phrase the ramp differently, for example 25°C for three days then raising flow by 5°C per day to design temperature; follow the written procedure your screed and UFH suppliers give you, and record it. Our guide to first switch-on walks through the day itself.
How long until floor coverings can go down?
Functional first heating proves the floor heats; it does not prove the screed is dry enough for coverings, and the same guidance says exactly that: the floor layer must verify moisture before laying. Drying guidance from screed manufacturers is roughly 1mm of depth per day up to 40mm, and about 0.5mm per day beyond that, under decent drying conditions, with ventilation recommended once the screed has set. So a 50mm flowing screed is weeks, and a 75mm sand and cement screed is months, unless force drying is used.
Before tiles, timber or vinyl go down, the flooring contractor should take a moisture reading appropriate to the screed type and keep the result with the commissioning record. Tiling has its own preparation rules on anhydrite screeds; see tiling over underfloor heating.
Can the underfloor heating be used to dry the screed?
Only if your screed manufacturer says so, because the industry does not speak with one voice. Some flowing screed makers allow commissioning the UFH to accelerate drying; at least one UFH system supplier states flatly that the heating should never be used to dry the screed and should not start until 21 days after laying. The screed maker's written instructions win, because the warranty that matters here is theirs. What everyone agrees on: never apply heat inside the initial curing period, never skip the gentle first step, and never blast a damp screed at design temperature.
Design your UFH system yourself in 3 minutes with MaxHeatUFH ProLoop and get an instant quick design and quote. Start your design
Frequently asked questions
Should UFH pipe be pressurised while the screed is poured?
Yes. Test before screeding and keep pressure on during the pour with the gauge visible, so any strike on a pipe shows immediately, while it can still be reached and repaired.
How soon can you walk on screed over UFH?
That is the screed maker's figure, not a UFH rule: flowing screeds typically take light foot traffic much sooner than sand and cement. Walking on it is separate from heating it, which waits for the curing period.
Can the screeder pour straight over unclipped pipe?
No. Unfixed pipe floats in flowing screed and gets kicked out of position in semi-dry screed, which ruins the designed pipe centres. Every run should be held by clips, rail or panels before the pour.
What temperature do you first run underfloor heating in a new screed?
Start at a flow temperature of 20 to 25°C and hold it for 3 days, then step up to the maximum design flow temperature for 4 days, after the curing wait of 21 days (cement) or 7 days (anhydrite).
Does the 21-day wait apply to anhydrite screed?
No, anhydrite's wait before first heating is 7 days in typical EN 1264-based commissioning guidance. The drying time before floor coverings is a separate, longer clock for both types.
Who is responsible if a pipe is damaged during screeding?
That is exactly why the pressure test record and the on-during-pour rule exist: they establish the pipe was sound and holding when the screeder started. Agree the protocol in writing beforehand and the question rarely needs a lawyer.
Do I need a moisture test before flooring?
Yes. First heating does not certify dryness, and flooring manufacturers set moisture limits for their products. The flooring contractor should test and record the reading before laying.
Products in this guide
Watch how each part works and how to fit it, and download its data sheet and install manual.



Every data sheet and manual: Product Library · All videos: MaxHeatUFH on YouTube

Design it in MaxHeatUFH ProLoop
Add your rooms, choose screed, overlay, joisted or electric, and get a free quick design and full kit list with prices.