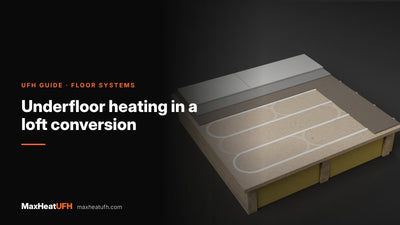
Underfloor heating in new builds and self-builds: when to fit it and the build sequence
When to install underfloor heating in a new build or self-build, the step-by-step sequence from insulation to screed, curing and heat-up times, and when floor finishes can go on.
Short answer: In a new build or self-build, fix the UFH design at first fix, then lay the pipe once the building is watertight with windows and external doors in. The usual order is insulation, edge strip, membrane, manifold, pipe, pressure test, then screed with the pipes kept under pressure. Let the screed cure before the first slow heat-up, and commission the heating before any floor finish goes down.
A new build is the best chance you will get to fit underfloor heating. You can choose the floor build-up, put the insulation where it needs to go, and hide every pipe in the screed or joist void. The catch is timing. UFH sits between the groundworks, the window fitter, the plasterer, the screeder and the floor layer, and getting the order wrong is one of the main causes of cracked screeds, cold rooms and lifted tiles.
This guide sets out when UFH goes in, the step-by-step build sequence for a screeded ground floor, what happens on joisted upper floors, and the drying and commissioning rules before floor finishes. The pipe laying itself is covered in how to install water underfloor heating.
When should underfloor heating be installed in a new build?
Lay the UFH pipes after the building is watertight, with the roof on and the windows and external doors fitted, and before the screed. The design should be done earlier, at first fix.
- At design stage: settle floor build-up heights, insulation depth, manifold positions and heat source. Our guide to UFH, Part L and the Future Homes Standard covers the insulation targets.
- At first fix: have the UFH design in hand so the plumber and electrician know where the manifold, wiring centre and thermostats go.
- Once watertight: lay the pipe. Industry guidance published for building control says loops should not go in until the building is watertight, to protect the pipe from frost.
Some developers screed at oversite stage, before the walls are up, and some screed after the structure is built. Both work. Screeding after the structure gives more freedom to change the layout before the pipe is buried.
What is the build sequence for UFH in a screeded floor?
Here is the usual order for a ground floor slab with a floating screed.
- Slab and DPM. The structural slab or beam and block floor is down, clean and level.
- Insulation. Lay insulation boards tightly butted and level. A new ground floor in England must meet a U-value of 0.18 W/m²K or better.
- Edge strip. Fix edge insulation around every wall and fixed object so the screed can move. Leave it empty or compressible, never grouted.
- Membrane. For a liquid screed, one maker asks for 500 gauge polythene over the insulation, pulled tight, with joints overlapped at least 100mm and taped to the edge strip.
- Manifold. Fix the manifold in its final position before laying pipe, and start every loop from it.
- Pipe. Clip the pipe to the design. In liquid screed, one maker asks for fixings every 400mm and more often at bends, so the pipe cannot float.
- Pressure test. Test each loop, at least 6 bar, and record it. Keep the system under pressure while the screed is laid so any damage shows at once.
- Screed. Pour or lay the screed to the specified depth, with movement joints where needed.
| Item | Rule |
|---|---|
| Sand and cement screed depth | At least 65mm in a home (BS 8204-1) |
| Liquid screed cover over pipe | One maker asks for at least 25mm |
| Movement joints | Bays over 40m² or 8m long, at doorways, and between heating zones |
| Laying conditions | No screed below 5°C |
| Loop length, 16mm pipe | Up to 100m |
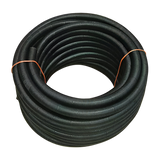
Only flow and return pipes should cross a movement joint, sleeved in flexible tube about 0.3m long. Our pipe conduit does this job, and also protects pipe where it rises out of the floor at the manifold. For screed choices and depths, see screed depths and drying times.
Should plastering come before or after the UFH screed?
Either can work, but agree it with the screeder and plasterer, because both are wet trades. What matters most is that the UFH goes in when the building is watertight, and that nothing heavy or sharp lands on exposed pipe.
- Screed first: the floor is protected from plaster drops once it is down, and the edge strip goes against bare blockwork. Protect the screed while it cures.
- Plaster first: the pipe and insulation stay clean. Fix the edge strip to the plastered wall.
- Either way: sequence the screeder so pipe is not left exposed for long, and protect the manifold with a cover until it is boxed in.
If an opening is not yet glazed, seal it with polythene before a liquid screed pour. Keep doors and windows closed for the first 24 to 48 hours after the pour, as the screed maker directs, then ventilate to let the screed dry.
Design your UFH system yourself in 3 minutes with MaxHeatUFH ProLoop and get an instant quick design and quote. A full loop design can follow at £0.40 per heated m². The design fee you paid is taken off the kit price when you order the kit linked to that design. Start your design
How long after screeding can you turn on underfloor heating?
Not before 21 days for a cement screed, or 7 days for a calcium sulphate (anhydrite) screed, unless the screed maker says otherwise. Do not use the heating to dry a wet screed.
Screed dries slowly. One screed maker, citing BS 8204, gives about 1mm a day for the first 40mm and half a millimetre a day after that, and only in good conditions of about 20°C and 65% humidity. Cold, damp sites dry far more slowly. Ventilate once the first 48 hours have passed, and do not use fossil-fuel heaters, which add moisture.
The first heat-up is slow and stepped. One calcium sulphate screed maker's schedule is:
- Start at about 20°C and hold for 24 hours.
- Raise the manifold flow by 5°C every 24 hours, up to 45°C.
- Hold at 45°C for 5 days.
- Lower by 5°C a day back to the start.
- Turn off and let it cool for 48 hours before moisture testing.
Always follow your own screed maker's schedule. Our guide to commissioning UFH and the first heat-up covers the setting of mixing valves and flow meters.
When can floor finishes go on after UFH?
Only after the heating has been commissioned and the screed has passed a moisture test. Commissioning first drives the remaining moisture out of the screed, rather than under your tiles or wood.
- Switch the UFH off 96 hours before a hygrometer test, and leave the hygrometer in place about 72 hours.
- Tile only when the screed reads 75% relative humidity or lower.
- Let the floor cool for at least 48 hours before tiling.
- Do not turn the heating back on until at least 48 hours after tiling is finished.
- Keep the floor surface at or below 27°C under tiles and under resilient finishes such as vinyl and LVT.
Pressure testing is not commissioning. You need both, and a record of each, at handover. Our guide to UFH floor coverings covers each finish.
How is UFH fitted on upper floors in a new build?
On timber or engineered joists, fit spreader plates or grooved chipboard after the joists are in and before the floor deck and ceilings below are finished. That keeps the pipe out of the way of other trades and lets you insulate the joist void.
- Spreader plates from above: insulation in the joist void, plates on the joists or battens, pipe, test, then the floor deck.
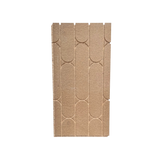
- Grooved chipboard: our MaxHeatChip 22mm P5 boards screw to the joists as the deck. A 6mm foil-backed fibre top board goes over the pipe.
- Engineered joists: follow the joist maker's rules for holes and notches. Plan pipe routes with the joist designer.
Keep the deck off until the loops have passed a pressure test. Our guide to UFH in joisted timber floors explains the choice.
What do you need to hand over at the end?
Building regulations require the occupants to be given information on using the system. For UFH, that should include:
- product manuals for the manifold, pump, mixing valve and thermostats
- zone floor plans showing which loop serves which room
- the pressure test and commissioning records
- how to use the thermostats, and how UFH differs from radiators
Frequently asked questions
Does underfloor heating go in before or after windows?
After. Lay the loops once the building is watertight, with windows and external doors fitted, so the pipe and screed are protected from frost and rain.
Is underfloor heating first fix or second fix?
The design and manifold position are first fix, along with thermostat and wiring centre cables. The pipe goes in before the screed, and the controls are connected at second fix.
Should UFH pipes be under pressure when screeding?
Yes. Keep the loops filled and under test pressure, at least 6 bar, while the screed is laid, so any damage shows straight away.
Can I use the underfloor heating to dry the screed?
No. Wait for the screed's minimum cure time, then follow a slow, stepped heat-up. Heating a wet screed too soon can crack it.
How thick should screed be over underfloor heating in a new build?
At least 65mm for a sand and cement screed in a home. Liquid screeds can be thinner, so follow the maker's minimum cover over the pipe.
Who should commission underfloor heating in a new build?
The heating engineer, before the floor finish goes down. MaxHeatUFH does not install, but we can pass your project to a vetted approved installer through our installation enquiry.
Do I need movement joints in a UFH screed?
Yes, in bays over 40m² or 8m long, at door thresholds, and between heating zones or heated and unheated areas.
Sources: PBC Today: UFH systems in floor screeds, Approved Document L Volume 1 (Table 4.1), and screed and UFH manufacturers' installation guidance to BS EN 1264
Products in this guide
Watch how each part works and how to fit it, and download its data sheet and install manual.


Every data sheet and manual: Product Library · All videos: MaxHeatUFH on YouTube

Design it in MaxHeatUFH ProLoop
Add your rooms, choose screed, overlay, joisted or electric, and get a free quick design and full kit list with prices.