Running UFH pipe through doorways, walls and between rooms
How to route and protect underfloor heating pipe through doorways, walls and joists: 400mm conduit sleeves, movement joints at doorways, EN 1264 wall clearances, feed pipes through other rooms and the notch and hole limits for timber joists.
Short answer: Run underfloor heating pipe through doorways and walls in one continuous length with no joints, and sleeve it with about 400mm of conduit wherever it passes through a wall, doorway, edge strip or movement joint, or rises to the manifold. Only flow and return pipes should cross a movement joint, and doorways often need one. Keep pipe at least 50mm from walls and 200mm from chimneys and shafts. In joisted floors, follow the notch and hole limits: notches no deeper than 0.125 of the joist depth, holes no bigger than 0.25 of the depth, on the centre line.
Every underfloor heating loop has to get from the manifold to its room and back. Unless the manifold is in that room, the pipe passes through doorways, under walls or across other rooms on the way. These crossing points are where pipe gets damaged: by screed movement at a joint, by a sharp masonry edge, or by a saw or screw years later.
This guide covers how to route and protect pipe through doorways and walls, what to do with the feed pipes that pass through other rooms, and the rules for notching and drilling joists. For where to put the manifold in the first place, see our guide to where to put a UFH manifold.
How do I run underfloor heating pipe through a doorway?
Lay the pipe through the doorway in one piece, sleeve it with conduit where it crosses the threshold, and plan for a movement joint in the screed at the door line if the rooms are heated separately.
- Sleeve it. One manufacturer fits a 400mm length of conduit over the pipe where it passes through doorways and internal walls, and allows about 2m of conduit per circuit.
- Expect a joint. LABC Warranty's technical manual asks for screed movement joints between independently controlled zones and between heated and unheated areas. One manufacturer shows an expansion profile across door thresholds. A doorway is the natural place for that joint.
- Only flow and return cross. One manufacturer's guide says only flow and return pipes should pass through expansion joints, covered with a flexible sleeve of about 0.3m spanning the joint. Do not lay the serpentine part of a loop back and forth across a joint.
- Keep the door clear. Keep pipe away from where door stops, threshold strips or door closers will be screwed down.
One manufacturer explains why the sleeve matters: its 40cm sleeves absorb the movement of the screed so the composite pipe stays protected for good. Without one, the two screed bays can shear the pipe as they expand and contract.
Can underfloor heating pipe go through or under walls?
Yes. Pipe can pass under or through internal walls to reach the next room, and doing so often shortens the route back to the manifold. One manufacturer's guide for existing floors suggests taking pipes through walls rather than round them where possible.
- Make the opening. Cut a neat slot or core a hole at floor level. Clean off sharp edges and loose mortar.
- Sleeve the pipe. Fit conduit through the full width of the wall and beyond it on each side. One manufacturer uses 400mm lengths at internal walls and where the pipe passes through the edge expansion strip.
- Keep it in one length. LABC Warranty says there must be no joints in the heating loops. Never join a loop inside a wall or under a floor.
- Mind the clearances. One manufacturer gives the EN 1264 clearances: more than 50mm from walls and other vertical structures, and more than 200mm from chimneys, fireplaces and shafts.
- Seal round it. Make good round the sleeve so screed does not run through to the next room before it is ready.
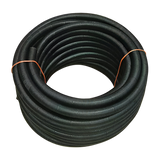
Our Pipe Conduit for 16mm pipe comes in a 25m coil, so you can cut a length for every crossing.
What about feed pipes passing through other rooms?
Feed pipes give off heat wherever they run, so plan their routes, count them in the loop length and protect them where they bunch together.
The flow and return tails from the manifold to a room are part of that loop. One manufacturer's handbook says the supply and return length is double the distance from the room to the manifold, and that length counts towards the loop's pressure loss. A loop 8m from the manifold has 16m of pipe before it starts heating its own room.
- Hallways and landings. Feeds to several rooms often crowd into a hall near the manifold. That area can end up warmer than the rest of the floor. Spread the feeds out where you can, or sleeve and insulate them.
- Rooms that need less heat. A bedroom with feeds to the lounge running through it will get some heat from them, whatever its thermostat says.
- Unheated areas. Insulate the feeds where they pass through a store, garage or other unheated space.
- Near the manifold. Conduit keeps the bunched flow and return pipes tidy, and a pipe support bend holds each pipe in a smooth turn up to the manifold.
One manufacturer also fits conduit where the pipe leaves the floor next to the manifold. That is one of the most damaged spots on any job, because it sits right where skirting and plasterboard go on.
Design your UFH system yourself in 3 minutes with MaxHeatUFH ProLoop and get an instant quick design and quote. A full loop design with routed feeds can be ordered later. Start your design
How do I run UFH pipe through floor joists?
Drill holes or cut notches only within the limits for solid timber joists, and check engineered joists with their maker. LABC's guidance for solid timber joists sets these limits:
| Cut | Maximum size | Where along the span |
|---|---|---|
| Notch (top or bottom, not both) | 0.125 × joist depth, up to 35mm | Between 0.07 and 0.25 of the span from the support |
| Hole (on the centre line) | 0.25 × joist depth, up to 65mm diameter | Between 0.25 and 0.4 of the span from the support |
Holes must also be at least three diameters apart, centre to centre. A worked example: on a 200mm deep joist, a notch can be up to 25mm deep and a hole up to 50mm across. On a 4m span, notches must sit between 280mm and 1m from the support, and holes between 1m and 1.6m from it.
- Engineered joists: LABC says its guidance does not apply to engineered joists such as I-joists. Use the joist maker's hole charts.
- Beams and binders: do not notch or drill structural beams without calculations.
- Run with the joists where you can, so fewer crossings are needed.
Our guide to underfloor heating on joisted floors covers the floor systems between and over joists.
How do I run pipe between rooms with different floor levels or systems?
Treat the change as a joint and protect the pipe through it. The pipe can run from a screeded room into a board room, or across a step, as long as it is sleeved, supported and not bent too tightly.
- Different systems: where a screed meets an overlay or timber floor at a doorway, sleeve the pipe through the junction and finish the screed edge with edge strip.
- Steps: take the pipe down or up the step in a smooth bend. Use a bending spring or bender for tight turns and never kink it.
- Heated next to unheated: LABC asks for a movement joint between heated and unheated areas. Sleeve the feeds across it.
How do I stop pipe being damaged after the floor is finished?
Record where every pipe crosses a wall or doorway, and keep the crossings away from places people will drill or fix.
- Photograph and measure every crossing before the screed or boards go down.
- Mark the drawing with each loop's route, especially feeds through doorways and halls.
- Keep pipe out from door stops, thresholds and the line where stud walls or kitchen plinths will be fixed.
- Hold the test pressure. One manufacturer keeps the system at 6 bar while the screed is laid so any damage shows straight away.
- Tell the other trades. Fitters fixing thresholds, door frames or skirting need to know where the pipe runs.
If a pipe is hit later, our guide to repairing damaged underfloor heating pipe explains the options.
Frequently asked questions
Do UFH pipes need sleeving through doorways?
Yes. Fit about 400mm of conduit where the pipe crosses the doorway. Doorways often carry a screed movement joint, and the sleeve lets the pipe ride through that movement without damage.
Can I have a joint in UFH pipe under a doorway?
No. Heating loops must be one continuous length with no joints in the floor. If a loop is too short, replace it with a longer length back to the manifold.
How many pipes can cross a movement joint?
Only the flow and return of each loop should cross it. Lay the heated part of the loop within one screed bay, and sleeve the two pipes where they cross.
How close to a wall can UFH pipe be?
EN 1264 asks for more than 50mm from walls and other vertical structures, and more than 200mm from chimneys, fireplaces and shafts.
Do feed pipes heat the rooms they pass through?
Yes. Any uninsulated pipe gives off heat. Where many feeds run through a hall or a room that needs less heat, spread them out, sleeve them or insulate them.
What size hole can I drill in a joist for UFH pipe?
For solid timber joists, up to 0.25 of the joist depth, with a 65mm maximum, on the centre line between 0.25 and 0.4 of the span. Engineered joists follow their maker's rules.
Do the tails to the manifold count in the loop length?
Yes. The flow and return to the room are part of the loop, so add twice the distance to the manifold to the pipe in the room.
Sources: LABC Warranty Technical Manual, Section 4 Ground Floors, LABC: notches and holes in solid timber joists
Products in this guide
Watch how each part works and how to fit it, and download its data sheet and install manual.


Every data sheet and manual: Product Library · All videos: MaxHeatUFH on YouTube

Design it in MaxHeatUFH ProLoop
Add your rooms, choose screed, overlay, joisted or electric, and get a free quick design and full kit list with prices.