








Heatmiser neoAir wireless thermostat setup with underfloor heating
How to set up a Heatmiser neoAir wireless thermostat with water underfloor heating, from Heatmiser's own manual: batteries, modes, pairing with the neoHub, UH8-RF wiring centre and RF-Switch, sensor settings and recovering lost pairing.
Short answer: A Heatmiser neoAir is a battery-powered wireless thermostat, so setting it up means pairing it with the device that does the switching: a neoHub for app control, a UH8-RF wireless wiring centre for a multi-zone water UFH manifold, or an RF-Switch receiver for a single zone. Fit the four AAA batteries, set the right mode, then start pairing from the thermostat's setup menu. On the current UH8-RF and RF-Switch you press pair on the receiver during a 99-second countdown; on the original UH8-RF you dial in a channel and zone number instead.
The neoAir is the wireless thermostat in Heatmiser's neo range. Because it runs on batteries and talks to the system by radio, you can put it wherever it reads the room best, with no cable chased into the wall. That makes it a favourite for retrofits, solid walls and rooms where the wiring ended up in the wrong place.
This guide walks through a neoAir setup with water underfloor heating, using the steps from Heatmiser's own manual: batteries, mounting, modes, then pairing with the neoHub, the UH8-RF wiring centre and the RF-Switch receivers. It also covers the sensor options that matter for UFH and what to do if a thermostat loses its pairing. For help choosing between Heatmiser models first, see our guide comparing the neoStat, neoAir and Slimline ranges.
What do you need before you start?
You need the neoAir itself plus a receiver, because the thermostat switches nothing directly. Which receiver depends on the job:
- Whole-house water UFH: a Heatmiser UH8-RF wireless wiring centre at the manifold, driving the actuators for up to 8 zones.
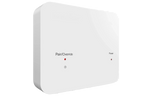
- Single zone or boiler switching: a Heatmiser RF-Switch two channel receiver.
- App control: add a Heatmiser neoHub G3, which connects to your router and puts every neo thermostat in the neoApp.
The neoAir thermostat takes four AAA batteries, which are supplied. Open the door on the bottom face, fit them the right way round, and do not use rechargeable batteries: Heatmiser's manual rules them out. A battery icon appears on the display when they need replacing.
One caution from the manual: the neoAir must not control electric underfloor heating. For an electric floor, use a thermostat with a floor probe designed for the job: our guide to the neoStat-e setup for electric UFH covers it. Heatmiser's RF-Switch 16A receiver pairs with a neoAir for other electric heating loads, and any mains connection must be made by a qualified electrician.
Which mode should the neoAir be in?
Set the mode before you pair, because it changes what the thermostat offers the receiver. Hold the menu key for 10 seconds to open SETUP, choose the mode with the left and right keys, then confirm:
- Mode 1, thermostat: heating only. This is the normal choice for a UFH zone.
- Mode 2, timer: a time clock with on/off switching, no temperature control.
- Mode 3, thermostat plus hot water timer: one neoAir runs a heating zone and times the hot water.
The screens look the same across neoAir V2, V2m and V3: Heatmiser's support steps treat them together, with the V3 using buttons rather than touch keys. Follow the manual for your exact version if a menu differs.
How do you pair a neoAir with the neoHub?
Pair with the neoHub when you want app control. The hub forms a mesh network, and each thermostat joins it as a named zone:
- Set the neoAir to Mode 1 (or Mode 3 if it also times hot water).
- Connect the neoHub to your router with the supplied ethernet cable and power it up.
- In the neoApp, register an account, sign in and choose Add neoHub. You only add the hub to your account once.
- When the app asks you to add a zone, enter the room name. On the neoAir, open the setup menu and press once so the mesh symbol flashes, then follow the app's countdown.
- The mesh symbol stops flashing and stays lit once the thermostat has joined. Add further thermostats with the + icon and Add Thermostat.
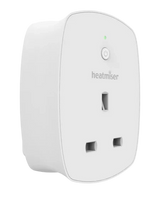
If a thermostat sits at the edge of radio range, a Heatmiser neoPlug can extend the mesh alongside the neoHub, UH8-RF or RF-Switch. Once the hub is in, you can also add smart speaker voice control through the neoApp.
How do you pair a neoAir with a UH8-RF wiring centre?
The UH8-RF sits at the manifold and switches the actuators, pump and boiler call. Pairing differs between the two versions, so check which you have first: our UH4 and UH8 wiring guide shows the terminals.
UH8-RF V2 (current):
- On the neoAir, open setup, press down once to reach P1, and press once. A 99-second countdown starts.
- On the UH8-RF V2, press and hold the pairing button on the channel you want until its LED flashes.
- The LED turns off when pairing succeeds. Confirm on the neoAir. One thermostat can pair to more than one channel if a room has two loops.
UH8-RF V1 (original):
- Set a unique channel number on the two dials inside the UH8-RF.
- On the neoAir, open setup and press down twice to reach P2.
- Enter the channel number (01 to 99), then the zone type, UF for underfloor, then the zone number (01 to 08), confirming each step.
Write the P2 values for every thermostat on the sticker on top of the UH8-RF. Heatmiser recommends keeping that record so a thermostat that loses its settings can be re-entered in minutes.
How do you pair a neoAir with an RF-Switch?
The RF-Switch is the single-zone receiver: it switches a boiler, zone valve or pump pack from one or two neoAir channels. The steps mirror the UH8-RF V2:
- On the neoAir, open setup, go to P1 and start the 99-second countdown.
- On the RF-Switch, press and hold CH1 (or CH2 on the two-channel version) for 5 seconds until the light flashes.
- The light turns off once paired. Confirm on the neoAir.
The RF-Switch 16A for electric heating pairs the same way: set Mode 1, start the P1 countdown, then hold the pair button for 5 seconds.
Where should you mount a wireless thermostat?
At eye level, on an internal wall, away from direct heat sources: that is Heatmiser's guidance, and it matters more for UFH because the floor itself radiates heat. The neoAir surface-mounts: separate the front from the back plate with a small flat-head screwdriver in the bottom slots, screw the back plate to the wall, and clip the front on. Avoid pressing hard on the LCD.
Because there is no cable, you can trial a position first and move it if the room reads warm or cold. Sunlit walls, spots above the manifold cupboard and dead corners behind doors all skew readings: our guide on where to put a UFH thermostat goes room by room.
Which sensor settings matter for underfloor heating?
Feature 06 in the setup menu picks the sensor, and for most water UFH zones the default is right:
| Feature 06 setting | Sensor used | When to use it |
|---|---|---|
| 00 (default) | Built-in air sensor | Normal rooms |
| 01 | Remote air sensor | Thermostat can't sit in the room |
| 02 | Remote floor sensor | Floor temperature control only |
| 03 | Built-in air plus floor limit | Temperature-sensitive floor finishes |
With option 03, Feature 07 sets the floor limit between 20 and 45°C, default 28°C. That is the setting to use over wood and other finishes with a maker's floor temperature cap. If the display shows error E2, the remote probe is disconnected, wired incorrectly or faulty. Add a Heatmiser wireless air sensor if you need remote air sensing.
Frost protection is built in: press the menu key once and the frost symbol appears. Heating then only runs if the room drops below the frost setting, default 12°C and adjustable from 7 to 17°C under Feature 03.
What if a neoAir loses its pairing or plays up?
On a UH8-RF system, read the P2 settings back before you reset anything: open setup, go to P2, and note the large number, the small number and the two letters. After a factory reset, hold the tick on SETUP for about 10 seconds, pick the mode, then reboot by reseating the battery case, you re-enter those same P2 values and the thermostat picks up where it left off.
Weak signal is the other common snag. Masonry walls and long distances thin the mesh, so move the thermostat, or add a neoPlug or another mains-powered neo device between the thermostat and receiver. For a wider look at whether wireless is right for the job at all, see wired vs wireless UFH thermostats.
Products for this job
- Heatmiser neoAir Wireless Programmable Smart Thermostat
- Heatmiser neoHub G3
- Heatmiser UH8-RF 8 Zone Wireless Wiring Centre
- Heatmiser RF-Switch Two Channel Receiver
- Heatmiser neoPlug
Design your UFH system yourself in 3 minutes with MaxHeatUFH ProLoop and get an instant quick design and quote. Start your design
Frequently asked questions
Does the neoAir need a neoHub to work?
No. Paired with a UH8-RF or RF-Switch it runs the heating on its own programme. The neoHub only adds app control, profiles and voice assistants.
How many neoAir thermostats can one UH8-RF take?
The UH8-RF has 8 channels, one per zone. A single thermostat can pair to more than one channel, which suits a large room with two loops on separate channels.
Can a neoAir control electric underfloor heating?
Heatmiser's manual says the neoAir must not control electric underfloor heating. Use an electric floor thermostat with a floor probe, such as the neoStat-e, with the final connection made by a qualified electrician.
What batteries does the neoAir take and can I use rechargeables?
Four AAA batteries, supplied in the box. Heatmiser says not to use rechargeable batteries. A battery symbol on the display warns you when they are low.
Can one neoAir run heating and hot water?
Yes, in Mode 3 it works as a thermostat for one heating zone and a timer for hot water, paired to two channels on the receiver.
What does the flashing mesh symbol mean?
The thermostat is in pairing mode and looking for the neoHub mesh. It stays lit solidly once the thermostat has joined the network.
What is error E2 on a neoAir?
E2 means the remote sensor probe is disconnected, wired incorrectly or faulty. Check the probe connection and the Feature 06 sensor setting.
Sources: Heatmiser neoAir manual, Heatmiser FAQ: resetting a neoAir on a UH8-RF, Heatmiser FAQ: neoStat and neoAir operating tips
Products in this guide
Watch how each part works and how to fit it, and download its data sheet and install manual.




Every data sheet and manual: Product Library · All videos: MaxHeatUFH on YouTube

Design it in MaxHeatUFH ProLoop
Add your rooms, choose screed, overlay, joisted or electric, and get a free quick design and full kit list with prices.


