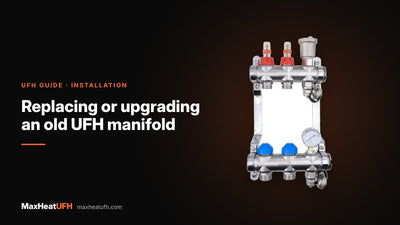
UFH manifold leaking: finding and fixing leaks at valves, flow meters and fittings
Where underfloor heating manifolds leak, how to find the exact source and isolate the manifold, and how to fix leaking flow meters, valve inserts, Eurocone connections and air vents.
Short answer: Most UFH manifold leaks come from one of five places: a flow meter sight glass, a valve insert under an actuator, a Eurocone pipe connection, a threaded end connection or the auto air vent. Dry the manifold, run the heating and watch where the water first appears. Small leaks are usually fixed by cleaning or replacing an O-ring, re-making a pipe connection or swapping one part. Turn off the power to any wiring centre below the manifold before you start.
A drip from the manifold is one of the most common UFH call-outs. The good news is that it is rarely the manifold bar itself. It is usually a seal, a connection or a small part that can be changed with the system drained down or isolated. The risk is what the water lands on: many manifolds have the wiring centre mounted directly below, and water there can trip a fuse or damage the electrics.
This guide shows you how to find the source, how to isolate the manifold safely, and how to fix each type of leak. Repair steps differ between manifold makes, so always check the instructions for the parts you have. Where we quote a figure, it comes from that maker's own instructions.
Where do UFH manifolds usually leak?
At the seals and joints, not the bar. Work through these points, starting from the top of the manifold, because water runs down and can make a leak look lower than it is.
| Leak point | What you see | Usual cause |
|---|---|---|
| Flow meter sight glass | Drip from the top or side of the clear tube | Damaged or dirty O-ring, cracked glass |
| Flow meter body | Wet where the meter screws into the bar | O-ring not seated, meter loose |
| Valve insert under actuator | Water around the valve pin or actuator base | Worn spindle seal |
| Eurocone pipe connection | Wet where the pipe enters the manifold | Pipe not reamed, insert not fully home, nut not tight |
| End connections and ball valves | Wet at the 1" unions or ball valves | Missing or damaged washer, poor thread seal |
| Auto air vent | Weeping from the vent cap | Dirt in the vent, worn vent |
| Drain and fill valves | Drip from the hose tail | Valve not fully closed, cap missing |
Leaks often start after the system has been drained, refilled or pressure tested, because that is when seals are disturbed. A new install that weeps at the pipe connections usually means a connection was not made up fully.
How do I find exactly where the leak is?
Dry everything, then let the leak show itself. The first wet spot to appear is the source.
- Protect the electrics. Switch off the fused spur to the wiring centre if it is below or beside the manifold. Cover it with a plastic sheet if you need power on to test.
- Dry the manifold. Wipe every joint, valve and meter with kitchen roll.
- Check the pressure gauge. Note the reading so you can see later whether the system is losing water.
- Run the heating. Turn up the thermostats so the loops open. Some leaks only show when the manifold is warm and the pipes expand.
- Dab each joint. Press a dry tissue against each joint in turn, top to bottom. A wet tissue marks the leak.
Water dripping onto a wiring centre is a real risk. One installer forum reports a flow meter sight glass leak that ran into the wiring centre below and tripped its fuse. If your wiring centre is directly under the manifold, consider moving it to one side when you make the repair.
How do I isolate the manifold for a repair?
Turn off the heat source and pump, close the main ball valves, then release the pressure. That lets you work on the manifold without draining the whole heating system.
- Turn the heating off at the thermostats and switch off the wiring centre and pump.
- Close the flow and return manifold ball valves.
- Fit a hose to a drain valve on the manifold and release the pressure into a bucket or drain.
- If you only need to work on one loop, close that loop's valve and its flow meter as well.
If your manifold has no isolating ball valves, you will need to isolate or drain the heating circuit that feeds it. Fitting a pair of ball valves while it is drained makes every future repair easier.
How do I fix a leaking flow meter?
Clean or reseat the sight glass first, and replace the flow meter if the glass is cracked or the leak comes back. Flow meters are a common leak point because the clear sight glass is sealed by an O-ring.
One manufacturer's instructions for its manifold flow meter give the method most makers follow:
- Close the valve. Remove the adjustment cover but leave the setting ring where it is, so you keep the flow setting.
- Unscrew the sight glass. Hold the valve spindle closed while you do it.
- Leave the indicator pin alone. One manufacturer warns not to touch the coloured indicator pin, because it seals against water leakage.
- Clean the glass gently. Take care not to damage the O-ring. Check it is seated, undamaged and clean.
- Refit and reopen. Screw the glass back, refit the cover, and open the valve to the setting ring.
If the meter body leaks where it screws into the bar, the whole meter needs removing and refitting with a good O-ring. One manufacturer gives tightening torques of about 3Nm when fastening its flow meter with the tool and about 0.5Nm when closing it, which shows how little force these parts need. Overtightening cracks them.
A cracked sight glass or a meter that still leaks should be replaced. A replacement manifold flow meter is sold on its own. Check it matches the thread and length of your existing meters, as they are not universal between makes. After fitting, set the flow rate again using our guide to flow meter settings.
Why is water coming from under the actuator?
The valve insert on the return bar has a worn spindle seal. The actuator sits on top of this valve, so water around its base usually comes from the valve, not the actuator itself.
Lift the actuator off and look at the valve pin. If it is wet, the insert needs replacing. One manufacturer's instructions for a replacement valve insert on its manifold give an example of how firmly these go in: screw the new insert in hand tight, then turn it on with a 21mm ring spanner to 30 to 35Nm. Other makes have different torques, so use the figure for your manifold.
- Isolate and depressurise the manifold before unscrewing an insert, or water will come out under pressure.
- Note the pre-setting on the old insert, if it has one, and copy it to the new one.
- Refit the actuator and check it opens and closes the new valve. Our guide to actuator and zone valve faults covers the test.
How do I fix a leaking pipe connection at the manifold?
Remake it with a properly prepared pipe end and a fresh insert. Most leaks at the pipe connections come from a pipe end that was not cut square, not chamfered, or an insert that is not pushed fully home.
- Isolate the loop and release the pressure.
- Undo the nut and pull the pipe out. Inspect the old insert and O-rings.
- Cut back the pipe square, past any marks or damage, with a proper pipe cutter.
- Chamfer the inside. One manufacturer's connection guide calls for a 2mm bevel all round the inner edge, made with a bevelling tool, so the insert O-rings are not cut on the way in. A star reaming tool does this.
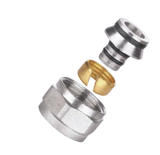
- Fit a new insert. Slide the nut onto the pipe, then push the insert in until it meets its end stop. Use new Eurocone connector cores rather than reusing old ones.
- Tighten the nut. One manufacturer specifies a 30mm open-ended spanner for its compression nuts. Tighten firmly, without forcing it.
If you cut pipe back, check you still have enough length to reach the port without strain. Our guide to connecting a UFH manifold shows the full connection method.
What if the leak is at the end connections or air vent?
Check the seal first, then replace the part. The 1" end connections, ball valves and end units seal with washers or thread sealant, and these can fail after the manifold has been moved or drained.
- Unions with flat washers: isolate, undo and fit a new washer. Do not add thread sealant to a joint designed to seal on a washer.
- Threaded joints without a washer: remake with a suitable thread sealant for heating systems.
- Auto air vent weeping: the vent may have dirt in it. If it keeps weeping, replace it. A manifold auto air vent end unit is a simple swap.
- Drain valves dripping: close fully and fit the cap. Replace the valve if it still drips.
What should I check after fixing the leak?
Refill, bleed and watch the pressure for a few days. A slow fall means there is still a leak, either at the manifold or somewhere else.
- Reopen the ball valves and any loop you closed.
- Top up the system to the pressure your boiler or heat pump maker recommends.
- Bleed air from the manifold. Our guide to bleeding air from underfloor heating shows how.
- Run the heating and check every joint you touched with a dry tissue.
- Check the pressure gauge daily for a week.
If the pressure keeps dropping with a dry manifold, the leak is elsewhere. If you would rather have the repair done for you, MaxHeatUFH passes installation and repair enquiries to vetted approved installers: request an installer.
Frequently asked questions
Why is my underfloor heating manifold dripping?
Usually a worn or dirty O-ring in a flow meter, a worn valve insert under an actuator, or a pipe connection that was not made up fully. Dry the manifold and run the heating to see which joint gets wet first.
Can I replace a flow meter without draining the system?
You need to isolate and depressurise the manifold, but you do not usually need to drain the whole heating system. Close the manifold ball valves and release the pressure through a manifold drain valve.
Is a leaking manifold dangerous?
The water itself is not, but it can be if it reaches the wiring centre or a socket below. Switch off the power to the wiring centre before you work on the manifold.
Can I use PTFE tape on Eurocone connections?
No. Eurocone connections seal on O-rings and the cone, not on the thread. If one leaks, cut back the pipe, chamfer it and fit a new insert.
Why did my manifold start leaking after a pressure test?
Test pressure is higher than working pressure, so it shows up any weak joint. That is the point of the test. Remake the joint that leaked and test again before the floor is covered.
Are flow meters the same on every manifold?
No. Thread size, length and scale vary between makes. Check the replacement matches your existing meters before you buy.
Should I replace the whole manifold if it leaks?
Rarely. Flow meters, valve inserts, air vents and pipe connections can all be replaced one at a time. Replace the whole manifold only if the bar itself is cracked or corroded.
Products in this guide
Watch how each part works and how to fit it, and download its data sheet and install manual.



Every data sheet and manual: Product Library · All videos: MaxHeatUFH on YouTube

Design it in MaxHeatUFH ProLoop
Add your rooms, choose screed, overlay, joisted or electric, and get a free quick design and full kit list with prices.