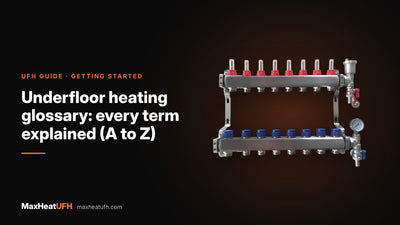
UFH manifold cabinets and boxing in: sizes, access and ventilation
How big a UFH manifold cabinet or cupboard needs to be, recessed versus surface cabinets, the clearances makers ask for, and what must stay accessible when you box a manifold in.
Short answer: Size a manifold cabinet or cupboard from the full assembly, not the bare manifold: one maker's bare manifold is 126mm wide for 2 loops and 626mm for 12, and adding ball valves and a pump and mixing set can add 270mm or more. Off-the-shelf cabinets run from about 400mm to 1,200mm wide, with recessed versions about 110 to 160mm deep. Leave at least 300mm from the finished floor to the lowest part and 100mm above and to each side for maintenance. You can box a manifold in, but the front must open fully so every valve, vent, flow meter and actuator can be reached.
A UFH manifold is not a pretty thing, so most people want it out of sight. That is fine, as long as the box around it is big enough, strong enough and easy to open. A manifold has parts you need to reach long after the floor is down: the air vents, the fill and drain valves, the flow meters you use to balance the loops, the actuators, the pump and the mixing valve.
This guide covers how big a cabinet or cupboard needs to be, recessed versus surface-mounted cabinets, the clearances makers ask for, what must stay accessible and how to build a simple boxed-in cupboard. If you have not chosen the spot yet, start with where to put a UFH manifold.
How big does a UFH manifold cabinet need to be?
It needs to fit the width of the whole manifold assembly, plus working room either side. The bare manifold width grows by about 50mm for each extra loop. One manufacturer publishes these widths for its manifold without attachments:
| Loops | Manifold width (no attachments) |
|---|---|
| 2 | 126mm |
| 4 | 226mm |
| 6 | 326mm |
| 8 | 426mm |
| 10 | 526mm |
| 12 | 626mm |
Then add what bolts on. One manufacturer's cabinet data sheet gives the width of its manifolds for 2 to 12 groups in three set-ups:
| Set-up (one manufacturer's premium range) | Width, 2 to 12 groups |
|---|---|
| Manifold only | 203 to 703mm |
| With ball valves | 268 to 768mm |
| With mixing set | 473 to 973mm |
So a pump and mixing set on the end can add about 270mm to the width. If the heat source runs hotter than the floor, you will have a mixing or blending pump pack, so plan for it from the start. Our guide to how many manifold ports you need helps you fix the loop count first, and UFH manifold sizes and dimensions lists the assembly measurements in detail.
If a long assembly will not fit on one wall, a 90° elbow connector set lets you mount the pump and mixing unit at right angles to the manifold, round the corner of a cupboard, with no extra pipework.
Should I use a recessed or surface-mounted cabinet?
Use a recessed cabinet when you can build it into a stud wall or a new wall, and a surface-mounted cabinet when you are fitting the manifold to a finished wall. Recessed cabinets sit almost flush and usually have adjustable depth and height. Surface cabinets are simpler to fit but stand proud of the wall.
| Cabinet (maker's data) | Widths | Depth | Height |
|---|---|---|---|
| Manufacturer A recessed | 400 to 1,200mm | 110 to 160mm, adjustable | Rails for manifold heights of 690 to 800mm |
| Manufacturer A surface | 450 to 1,250mm | 150mm | 700mm |
| Manufacturer B recessed | 445 to 1,060mm | 108 to 145mm, adjustable | 585 to 675mm, adjustable |
| Manufacturer B surface | 420 to 1,200mm | About 130mm | About 600mm |
Two points from those data sheets are worth knowing. Manufacturer B says the wall opening for a recessed cabinet should be about 5mm wider than the cabinet. Manufacturer A says its surface cabinets are mainly meant for retrofits and come without a back panel unless you order one. Both makers offer lockable doors, which helps where children could reach the valves.
Check the depth against your manifold. Actuators, flow meters and ball valve handles all stand off the wall. If the cabinet is too shallow, the door will not close or you will knock the flow meters every time you open it.
How much clearance does a manifold need?
Leave at least 300mm from the finished floor to the lowest part of the manifold and pump set, and 100mm above and to each side. Those are one manufacturer's figures for its manifold and pump pack, given for future maintenance. The floor gap matters because the loops rise out of the floor and have to bend up into the manifold without kinking.
The wall also has to take the weight. One manufacturer asks for a flat, sound wall that can carry the manifold, the pump and the mixing valve, full of water. On a stud wall, fix a strong backboard across at least two studs before you mount anything.
Where the pipes leave the floor beside the manifold, fit conduit over them. One manufacturer's screed guide asks for conduit at this point, and it protects the pipe where it bends up through the floor surface.
Can I box in a UFH manifold?
Yes, as long as the boxing is easy to remove or has a door across its full width. Do not tile, plaster or seal a manifold in. One manufacturer's instructions say the manifold should be easily accessible for future maintenance and servicing, and suggest the homeowner checks it monthly and an engineer checks it once a year.
These parts need to be reachable without tools or with a screwdriver at most:
- Air vents at the ends of the bars, for bleeding air out.
- Fill and drain valves, with room to attach a hose.
- Flow meters or balancing valves, which you adjust when commissioning and may need to adjust again.
- Actuators on the return bar, which are swapped if one fails.
- Isolating ball valves, so the manifold can be shut off for work without draining the whole system.
- Pump and mixing valve, including the pump's speed setting and the mixing valve's temperature knob.
- Pressure gauge, which should be visible when the door is open.
A door that only opens partway is the most common problem. If you cannot see the flow meters straight on, balancing becomes guesswork. Our guide to balancing UFH loops shows what you will be doing at the manifold.
Does a manifold cupboard need ventilation?
The manifold cabinet data sheets we checked do not set any ventilation requirement, and most factory cabinets are closed steel boxes with a door. What matters more is that the space stays dry and that a leak would be noticed. Do not put the manifold in a sealed void where a weeping joint could drip for weeks before anyone sees it.
Keep the electrics in mind too. A wiring centre such as the Heatmiser UH8 is rated IP20, which means it is for dry indoor locations only. Mount it beside or above the manifold so that it is not under the pipe joints, and keep its cover clear for the electrician.
Where does the wiring centre go?
Put it within reach of the actuator cables, usually on the wall beside or above the manifold. The Heatmiser UH8 and UH4 both measure 384 x 148 x 60mm, so allow for that box when you size the cupboard. Actuator cables are short, so a wiring centre in another room needs junction boxes, which add faults. See our guide to the UFH wiring centre explained.
Wiring the wiring centre, pump and boiler or heat pump connection is a job for a qualified electrician. Leave enough room in the cupboard for them to work on the terminals with the cover off.
How do I build a boxed-in manifold cupboard?
Treat it like a small service cupboard with a full-width door. A simple sequence:
- Fix the loop count and parts. Know the number of ports and whether there is a pump and mixing set before you build anything.
- Mark the floor gap. At least 300mm from finished floor level to the lowest part of the assembly.
- Fit a backboard. Plywood fixed to studs or masonry, wide enough for the manifold, pump set and wiring centre.
- Mount and connect. Fit the manifold level, then the valves, pump set and conduit over the loop pipes.
- Frame the box. Allow at least 100mm clear above and to each side, and enough depth for the actuators and valve handles.
- Hang a full-width door. Hinged or lift-off, so the whole manifold is visible when it is open.
- Label everything. Mark each loop with its room and the flow rate you set, and stick the wiring diagram inside the door.
The labelling step costs nothing and saves hours later. When a room goes cold, the first thing anyone does is open this door.
Design your UFH system yourself in 3 minutes with MaxHeatUFH ProLoop and get an instant quick design and quote. Start your design
Frequently asked questions
What size cupboard do I need for an 8 port manifold?
Allow for the full assembly. One maker's 8 loop manifold is 426mm wide on its own, and a pump and mixing set can add around 270mm. Add 100mm clearance each side and you are looking at a cupboard about 900mm wide inside if the pump set sits on the end.
How high off the floor should a UFH manifold be?
One manufacturer asks for at least 300mm from the finished floor to the lowest part of the manifold and pump set. That gives the pipes room to bend up from the floor without kinking.
Can I put a UFH manifold behind a kitchen unit?
Only if the unit back or a panel can be removed so the whole manifold is reachable. You need to see the flow meters and reach the vents, valves and actuators. A tall larder unit with a removable back is easier to work with than a base unit.
Can I tile or plaster over a manifold?
No. The manifold has to stay accessible for bleeding, balancing and replacing actuators, and makers ask for it to be easy to reach for servicing.
How deep should a manifold cabinet be?
Recessed cabinets from two makers adjust from about 108 to 160mm deep. Check your manifold with actuators and valve handles fitted before you choose, as these stand off the wall.
Do I need a lockable manifold cabinet?
Not by law, but it helps in homes with young children, or in rentals and communal areas where you do not want people adjusting the flow meters or mixing valve.
Can the wiring centre go inside the manifold cupboard?
Yes, if there is room and it is above or beside the manifold rather than under the joints. The wiring centre is a dry-location IP20 product, so keep it out of the way of any drips.
Sources: Heatmiser UH8 manual
Products in this guide
Watch how each part works and how to fit it, and download its data sheet and install manual.




Every data sheet and manual: Product Library · All videos: MaxHeatUFH on YouTube

Design it in MaxHeatUFH ProLoop
Add your rooms, choose screed, overlay, joisted or electric, and get a free quick design and full kit list with prices.