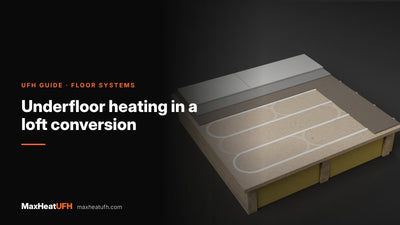
How to install grooved chipboard underfloor heating panels
How to fit 22mm grooved (routed) chipboard underfloor heating on joists: checking joists, laying and gluing the boards, notching and drilling rules, laying pipe, pressure testing and fitting the foil-backed top board.
Short answer: Lay the 22mm grooved chipboard across the joists with its grooves lined up, glue every tongue and groove joint, land the short edges on a joist or nogging, leave a 10mm gap at the walls and screw the boards down. Vacuum the grooves, press the pipe in, connect it to the manifold and pressure test. Then fit the foil-backed top board, foil side down, with joints staggered from the chipboard and screws kept well away from the pipe, ready for the floor finish.
Grooved (routed) chipboard is the structural floor and the pipe holder in one. The boards replace ordinary floor decking, so the heating adds very little height and no wet trades. It is the usual choice for new joisted floors, loft conversions and first floors where the old boards are coming up anyway.
This guide follows the job in order: checking the joists, laying the boards, getting the pipe through to the manifold, laying the loops, testing, and fitting the top board. For a wider comparison with spreader plates, see our guide to underfloor heating in joisted timber floors.
What do I need for a grooved chipboard install?
You need the grooved boards, a top board, two sizes of screw, wood adhesive for the joints, insulation between the joists and the pipe. Order the board version that matches your pipe size.
| Item | What to know |
|---|---|
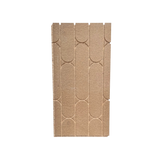
| MaxHeatChip grooved chipboard | 22mm P5 moisture-resistant, grooves at 150mm centres, four per board, radius returns at both ends. 1200 x 600mm (0.72m²) or 2400 x 600mm (1.44m²), for 12mm or 16mm pipe |
| 6mm foil-backed fibre top board | 1200 x 600mm, 150 micron aluminium foil backing to spread heat |
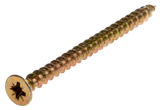
| Chipboard screws | 5 x 80mm for boards to joists, 4 x 20mm for the top board to the chipboard |
| Pipe | 12mm or 16mm, to match the board |
| Insulation | Between the joists, under the boards |
Divide the floor area by the board area and round up, with a few extra for cuts.
Are my joists suitable for grooved chipboard?
Most standard domestic joists are, as long as they are level, sound and at the spacing the board is rated for. Check the joist centres before you order.
One maker's routed chipboard guide, for example, is written for joists at 400mm centres and asks for technical approval at other spacings. Whatever board you use, the joists should be level, structurally sound and clear of debris. Wide joist centres or a bouncy floor need extra noggings or a structural check first.
Fit the insulation between the joists before the boards go down. It stops the heat going into the void or the room below. Our guide to insulation under underfloor heating covers what to use over heated and unheated spaces.
How do I lay grooved chipboard boards?
Lay the boards across the joists, glue every joint and screw them down, keeping the grooves lined up from board to board. Straight, continuous grooves are what make the pipe easy to lay.
- Acclimatise the boards. One maker leaves its boards in the room for 24 hours before fitting and keeps them dry, flat and off the ground.
- Plan the groove direction. The grooves run along the long edge of the board, so the pipe runs across the joists. Plan the loop order and where the returns fall before you fix the first board.
- Start in the far corner. Leave a 10mm expansion gap at the walls and lay the first boards across the joists with the grooved edges to the wall.
- Glue the joints. Run a continuous bead of adhesive along the tongue and into the groove, then knock the next board home so the joints and routes are flush with no gaps.
- Support the short edges. Land them on a joist. Where that is not possible, fit noggings beneath.
- Use sensible offcuts. One maker keeps offcuts at least 200mm wide, places the cut edge at the outside and lines up the routes when starting the next row.
- Screw down. Fix through to the joists with countersunk screws to the board maker's pattern. Our 5 x 80mm screws are sized for this. Keep screws out of the grooves.
- Stagger the joints. Offset the end joints from row to row, but keep every groove aligned.
How do I get the pipe from the manifold into the floor?
Bring the pipe tails down into the joist void near the manifold and route them along or through the joists to the first groove. Any notch or hole in a joist must stay within Building Regulations limits.
LABC's guidance for solid timber joists in homes allows:
- Notches: in the top or the bottom of the joist, not both, no deeper than 0.125 of the joist depth and no more than 35mm, between 0.07 and 0.25 of the span from the support.
- Holes: on the centre line only, no more than 0.25 of the joist depth and 65mm diameter, between 0.25 and 0.4 of the span, and at least three diameters apart.
- Engineered joists: this guidance does not apply. Follow the joist maker's instructions.
One maker suggests drilling an angled hole through the board into the void early on to bring the tails through. Where you rout extra grooves by hand, fit extra noggings beneath for support. At the manifold, a pipe support bend holds each tail in a clean 90° turn.
How do I lay the pipe in the grooves?
Vacuum the grooves, then press the pipe fully into them from the manifold outwards, turning at the radius returns at each board end. The pipe must sit at or below the board surface.
- Clean first. Grit in a groove holds the pipe proud and can damage it under load.
- Press it home. Work along the run, pushing the pipe fully into the route. Do not hammer it.
- Turn at the returns. MaxHeatChip has radius returns cut at both ends of each board, so the pipe turns back without extra routing.
- Watch the bend radius. One leading manufacturer gives 5 times the pipe diameter as the minimum for a supported bend. A kinked loop should be replaced.
- Keep loops to length. Each loop goes back to its own manifold ports. One leading manufacturer limits 12mm circuits to 80m in its overlay system and 16mm circuits to 100m in its screed systems, which are sensible limits here too.
Because the grooves are fixed at 150mm, you cannot tighten the spacing along a cold wall. If a room needs more output than 150mm centres gives, deal with it at the design stage.
Design your UFH system yourself in 3 minutes with MaxHeatUFH ProLoop and get an instant quick design and quote. Start your design
When do I pressure test, and how do I fit the top board?
Pressure test once the pipe is in and connected, before the top board goes on. One board maker fits its cover board while the system is still under pressure, so a stray screw shows up straight away.
- Fill, purge and test. Follow our guide to pressure testing underfloor heating and keep the record.
- Mark the pipe routes. Draw the runs on the walls or a plan so nobody screws into them later.
- Lay the top board foil side down. The foil faces the pipe and spreads its heat across the floor.
- Stagger the joints. Keep the top board joints off the chipboard joints below.
- Screw clear of the pipe. Use 4 x 20mm screws into the chipboard, away from the routes. A short screw will not reach through 22mm chipboard to the void.
Which floor finishes can go on top?
Most finishes can, as long as you follow the finish maker's rules for heated timber floors. The top board gives a flat, stable base.
- Tiles: on suspended timber, The Tile Association calls for a C2 S1 or S2 deformable adhesive.
- Wood and laminate: One leading manufacturer keeps the floor surface at or below 27°C under timber finishes.
- Carpet: One board maker does not recommend carpets over 1.5 tog on its system. High tog finishes block the heat.
- Glued finishes: prime the board first if the finish is to be stuck down.
Our guide to underfloor heating under tiles, LVT, laminate, wood and carpet covers each finish in detail.
Products for this job
- MaxHeatChip Grooved Chipboard Panel (22mm)
- 6mm Foil-Backed Fibre Top Board
- Chipboard Screws for UFH Panels
- All joisted floor systems
Frequently asked questions
Which way should grooved chipboard run?
Across the joists, like ordinary floor decking, with the short edges landing on a joist or nogging. The grooves then run across the joists too.
Do I need to glue grooved chipboard?
Yes. Glue every tongue and groove joint and knock the boards tight so the joints and routes are flush. Glued joints stop the floor creaking and moving.
Do I need a top board over grooved chipboard?
Yes, for most finishes. A foil-backed top board spreads the heat between the grooves and gives a flat base. Lay it foil down with staggered joints.
Can I tile onto grooved chipboard?
Tile onto a suitable top board, not straight onto the chipboard. Use a C2 S1 or S2 deformable adhesive on suspended timber floors.
What pipe spacing does grooved chipboard give?
MaxHeatChip boards have grooves at 150mm centres. You cannot change the spacing on site, so check the room's heat loss before you choose the system.
Can I fit grooved chipboard over existing floorboards?
It is made to fix directly to joists as the structural deck. Over an existing floor, a low-profile overlay board is usually the better choice.
How do I avoid screwing through the pipe?
Pressure test before the top board, keep the system under pressure while you fix it, mark the pipe runs and use short screws for the top board.
Sources: LABC: notches and holes in solid timber joists, The Tile Association: tiling to heated floors, and manufacturers' installation guidance to BS EN 1264
Products in this guide
Watch how each part works and how to fit it, and download its data sheet and install manual.



Every data sheet and manual: Product Library · All videos: MaxHeatUFH on YouTube

Design it in MaxHeatUFH ProLoop
Add your rooms, choose screed, overlay, joisted or electric, and get a free quick design and full kit list with prices.