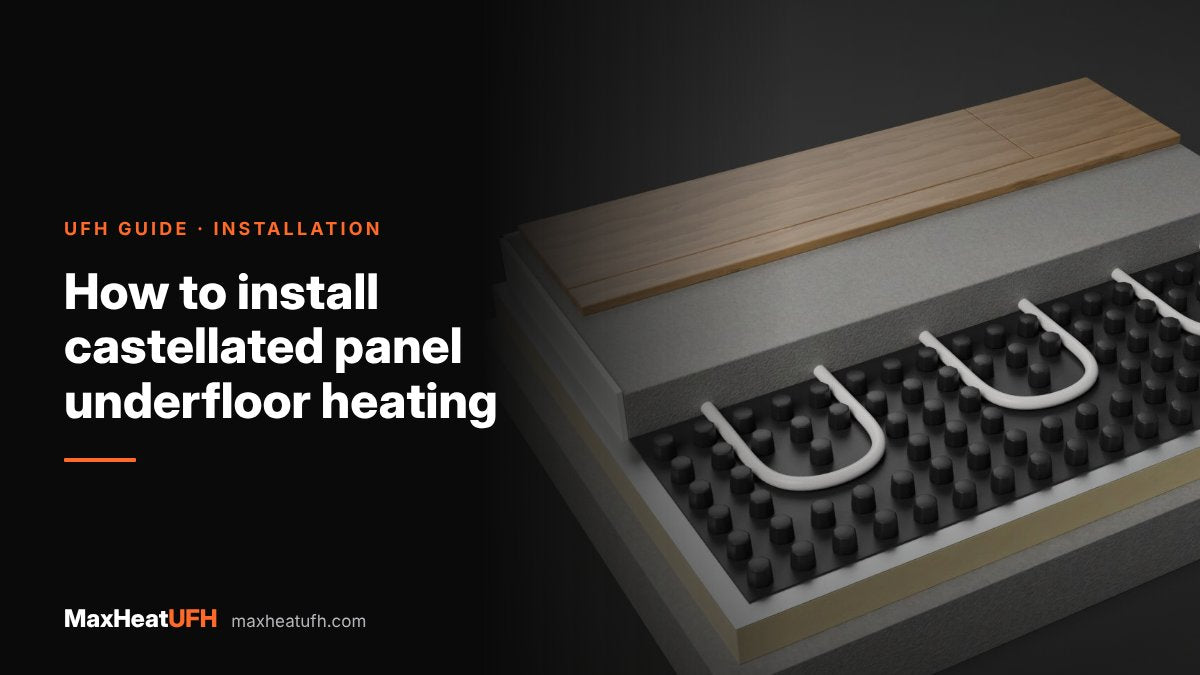
How to install castellated panel underfloor heating
How to lay castellated (egg crate) underfloor heating panels: floor preparation, overlapping the panels, laying pipe between the bosses, bends, screed or levelling compound depths, testing and expansion joints.
Short answer: Lay the insulation and edge strip, then lay the castellated panels over the whole floor with their edges overlapped and locked together so screed cannot get underneath. Walk the pipe in between the bosses at your design centres, wrapping two bosses for a 90° bend and three for a 180° bend, and use clips instead of panels at the manifold where the pipes bunch together. Pressure test to 6 bar, keep the pipe under pressure, then pour the screed or levelling compound to the depth its maker sets.
A castellated panel, also called an egg crate or knob panel, is a moulded plastic sheet covered in raised bosses. The pipe pushes in between the bosses and is held without clips or staples. That makes pipe laying quick, keeps the spacing even and stops the pipe floating up in a flowing screed.
There are two main types. Standard panels sit on insulation under a screed. Low-profile panels for 12mm pipe stick straight to a primed subfloor and are covered with a levelling compound. This guide covers both, step by step. For choosing between castellated panels and staples for a liquid screed pour, see our guide to castellated panels and liquid screed.
Which castellated panel do I need?
Match the panel to the pipe size and the floor build-up. Use a standard panel for 15 to 17mm pipe under screed, and a low-profile self-adhesive panel for 12mm pipe under levelling compound where floor height is tight.
| Panel | Size | Pipe | Finished with |
|---|---|---|---|
| MaxHeatUFH Castellated Floor Panel | 1220 x 820mm, 20mm | 15, 16 or 17mm | Screed or levelling compound |
| MaxHeatSolo egg crate panel | 1000 x 600mm, self-adhesive | 12mm | Levelling compound on a primed subfloor |
MaxHeatSolo covers 0.6m² per panel and has a minimum order of 10 panels.
How do I prepare the floor?
Start with a flat, clean, dry base, then fit the insulation and edge strip before any panel goes down. For a self-adhesive panel, prime the subfloor first.
- Check the base. It needs to be flat and sound. High spots stop the panels sitting down and make the pour thicker in places.
- Insulate (screed systems). One leading manufacturer's guide sets insulation so that downward heat loss stays at or below 10W/m², in line with BS EN 1264. Lay the boards tight together with staggered joints. See our guide to insulation under underfloor heating.
- Fit the edge strip. Run it round every wall and round columns, steps and door frames, with its plastic skirt laid over the insulation so screed cannot seep into the edge joint. One leading manufacturer allows about 1.1m of strip per m² of floor.
- Prime (self-adhesive panels). MaxHeatSolo's backing is made to stick to a primed subfloor. Use a primer suited to the surface and follow its drying time.
How do I lay and join the panels?
Overlap each panel onto the next by interlocking the edge row of bosses, so the floor becomes one continuous sheet. Never just butt panels together under a flowing screed.
- Start at a wall. One leading manufacturer lays the first panel with its half-boss edge against the wall, then overlaps the half bosses onto the three-quarter bosses of the next panel. Check which edge of your panel is the overlap edge before you start.
- Cut to fit. Panels cut with a saw or snips. You can also overlap a panel further to the nearest boss instead of cutting.
- Secure the edges. For pumped screed, one leading manufacturer staples the panels firmly round the room perimeter and stresses that joints must overlap, not butt up. A flowing screed will find any gap and lift a loose panel.
- Stop short of the manifold. Where many pipes come together in front of the manifold, the bosses get in the way. One leading manufacturer leaves panels out there and holds the pipes with clips on plain insulation instead.
How do I lay the pipe in a castellated panel?
Push the pipe down between the bosses with your foot as you walk the loop, following the design spacing. The bosses set the spacing, so you can only choose steps of the boss pattern.
- Leave a tail. Start at the manifold with enough pipe to reach the flow port.
- Lay at the design centres. One leading manufacturer's panel takes pipe at 100mm or 200mm centres, with 300mm for 18mm pipe.
- Make the bends round the bosses. One leading manufacturer's minimum bend is two bosses encircled for a 90° turn and three for a 180° turn. That keeps the bend within the pipe's limit, which another manufacturer gives as 5 times the diameter for a supported bend, 80mm radius for 16mm pipe.
- Choose the pattern. At 100 or 200mm, one leading manufacturer lays a spiral: the first pass at twice the final spacing, then back out between the runs, finishing with a double return in an S shape. At 300mm it uses a back and forth serpentine.
- Keep loops to size. One leading manufacturer limits each circuit to 100m, which covers about 11m² at 100mm centres or 22m² at 200mm.
- Sleeve where needed. Fit about 400mm of conduit where pipe passes through walls or doorways, crosses a joint or rises to the manifold.
A decoiler stops the pipe twisting as it comes off the coil, which matters with castellated panels because a twisted pipe springs back out of the bosses.
See it on a real job: Allgreave Chapel, an 1871 Peak District chapel heated with castellated panels and 16mm PERT-AL-PERT pipe, with the loops routed around the iron columns.
Design your UFH system yourself in 3 minutes with MaxHeatUFH ProLoop and get an instant quick design and quote. Start your design
How deep should the screed be over a castellated panel?
It depends on the material. Sand and cement screed needs at least 65mm in a home. Flowing screeds and levelling compounds can be much thinner, but only to the minimum their maker publishes for heated floors.
| Material | Published minimum | Source |
|---|---|---|
| Sand and cement screed, domestic | 65mm | BS 8204-1 |
| Calcium sulphate flowing screed (one maker) | 25mm cover over pipes, 35mm floating domestic | Manufacturer data sheet |
| Levelling compound over a 12mm nub panel (one system) | 4 to 8mm over the panel on a bonded base | Manufacturer data |
Two points catch people out when ordering. First, the panel takes up space: one leading manufacturer says its panel takes about 15% of the screed volume once poured. Second, a calcium sulphate screed has a lower water temperature limit. The Tile Association gives a 45°C maximum operating water temperature for calcium sulphate screeds.
For low-profile panels under levelling compound, use a compound made for heated floors and follow its primer, mesh and layer rules. One fibre-reinforced compound, for example, goes down 2 to 30mm in one pass and needs a primer to suit the base.
How do I test the pipe before the pour?
Fill and purge each loop, then test the whole system at the maker's pressure before any screed goes down. Keep it under pressure during the pour.
One leading manufacturer keeps the system at 6 bar during screeding to protect the pipe walls and show any damage at once. It also asks for the screed to be well compacted round the pipe so there are no voids. A flowing screed does this on its own. A sand and cement screed needs firm tamping between the bosses. Our guide to pressure testing underfloor heating covers the method and the record to keep.
Where do I need expansion joints?
Under stone or ceramic finishes, put a joint in the screed at least every 40m², keep each bay under 8m long and no more than twice as long as it is wide. Long corridors also need joints.
That rule comes from BS EN 1264-4. Only flow and return pipes should cross a joint, and they should be sleeved in conduit where they do. Mark every joint on the drawing so the tiler can follow it through the finish.
When can I turn the heating on?
Only once the screed has cured, and then slowly. Do not use the heating to dry the screed.
One leading manufacturer's instruction is clear: never use the system to dry or cure the screed, then raise the flow temperature slowly to the design figure once it has cured. Flowing screeds can be quicker. One calcium sulphate maker allows the heating on after 7 days. For timber finishes, the same manufacturer runs the heating for at least two weeks to dry the screed first and keeps the floor surface at or below 27°C. Our commissioning guide sets out the first heat-up.
Products for this job
- MaxHeatUFH Castellated Floor Panel 1220 x 820mm
- MaxHeatSolo Self-Adhesive Egg Crate Panel for 12mm pipe
- Edge Insulation Foam Roll
- Ultra Prime IT Multi Surface Primer 5L
- All castellated panels
Frequently asked questions
Do castellated panels need clips?
No. The bosses hold the pipe. The only place you need clips is in front of the manifold, where the pipes are too close together for the panel and are fixed to plain insulation instead.
Should castellated panels overlap or butt together?
Overlap them by locking the edge row of bosses together. Butted joints let flowing screed get underneath and lift the panels.
What pipe spacing can I use in a castellated panel?
Only steps of the boss pattern. One maker's panel gives 100mm or 200mm, and 300mm with larger pipe. Check your panel's pattern before you design the loops.
Can I use liquid screed over castellated panels?
Yes, it is one of the best uses for them. Overlap the joints, staple the panel edges at the perimeter and keep the edge strip skirt over the panel edge so screed cannot get underneath.
How thin can the floor be with a 12mm egg crate panel?
With a self-adhesive 12mm panel and a levelling compound, the build-up can be very low. One system lists 4 to 8mm of compound over the panel on a bonded base. Always use the compound maker's figure.
Does the panel reduce how much screed I need?
A little. One maker says its panel takes up about 15% of the screed volume. Give your screed supplier the panel type when you order.
Can I walk on the panels before screeding?
Yes, carefully. Pipe is usually pressed in by foot. Lay boards to walk on once the pipe is in, so you do not tread loops out of the bosses.
Sources: The Tile Association: tiling to heated floors, and manufacturers' installation guidance to BS EN 1264
Products in this guide
Watch how each part works and how to fit it, and download its data sheet and install manual.



Every data sheet and manual: Product Library · All videos: MaxHeatUFH on YouTube
Design it in MaxHeatUFH ProLoop
Add your rooms, choose screed, overlay, joisted or electric, and get a free quick design and full kit list with prices.