








Heatmiser Neo smart setup: neoHub, app, Alexa and Google Home with underfloor heating
Step-by-step setup of the Heatmiser neoHub for underfloor heating: connecting the hub, pairing neoStats, and linking Alexa, Google Home and Apple Home.
Short answer: Plug the Heatmiser neoHub into your broadband router with its Ethernet cable, wait for the Link light to turn green, then add it in the free neoApp with Add Location and the Connect button on the hub. Add each neoStat as a zone, starting with the one nearest the hub. Once the thermostats are in the app, enable the Heatmiser Neo skill in the Alexa app or link Heatmiser Neo in the Google Home app, signed in as the master owner of the neo account.
The neoHub is the gateway that lets Heatmiser neo thermostats talk to your phone and to voice assistants. The thermostats still do the work at the wall and at the wiring centre. The hub adds remote control, schedules you can set from the sofa, and links to Alexa, Google Home, Apple Home and IFTTT. One hub runs up to 32 neo devices across the house.
This guide walks through the whole setup for underfloor heating: what you need, connecting the hub, pairing thermostats, then Alexa, Google Home and Apple Home, and what to do when something will not pair. For choosing between neo models, see neoStat vs neoAir vs Slimline.
What do you need to control underfloor heating from your phone?
You need neo thermostats, a neoHub plugged into your router, and the free neoApp. The exception is the neoStat WiFi, which joins your home WiFi directly and does not use a hub at all.
| Item | Job |
|---|---|
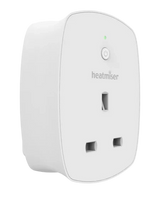
| Heatmiser neoHub G3 | Gateway to the app and voice assistants |
| neoStat V3 | Wired 230V room thermostat, one per zone |
| neoAir | Battery thermostat for rooms with no cable |
| neoStat-e | Electric UFH thermostat with floor probe |
| UH8 wiring centre | Links wired thermostats to actuators and pump |
| neoStat WiFi | Single zone, app control with no hub |
A few things to check before you start:
- A free port on the router. The neoHub connects by Ethernet, not WiFi, and the router must hand out addresses automatically (DHCP).
- Hub generation. The neoStat V3 needs a 2nd generation neoHub or later. It does not work with the 1st generation hub or the neoHub Mini.
- Thermostats wired and working. Wired neoStats are 230V and Heatmiser states they must be installed by a qualified electrician. For how the wiring centre, actuators and pump connect, see UFH zoning, thermostats and wiring centres.
How do you set up the neoHub?
Connect it to the router, power it up and add it in the neoApp. The whole job takes a few minutes.
- Connect the cable. Plug the supplied Ethernet cable from the neoHub into a spare port on your router. Plug it straight into the router, not into a network switch.
- Power it on. Fit the right plug adaptor and switch on. The Link light turns green once the hub reaches the Heatmiser cloud server.
- Install the neoApp on your phone or tablet and create an account. This first account becomes the master owner.
- Join the same network. Connect your phone to the WiFi from the router the hub is plugged into. Turn off mobile data for now so the phone does not search over 4G.
- Add Location. In the app, choose Add Location, then press the Connect button on the neoHub when asked.
- Name the location, for example "Home". You can then choose Finish, or go straight on to add zones.
How do you pair a neoStat with the neoHub?
Choose Add Zone in the app, name the zone, then put the thermostat into pairing mode within two minutes. The steps on a current neoStat V3 or neoStat-e are:
- In the app, select Add neoStat (or Add Zone), enter a name such as "Kitchen" and press Next. You now have two minutes.
- On the thermostat, use the left and right keys to select the setup icon, then press and hold the tick key.
- Press tick once with SETUP highlighted. Feature 01 shows on the screen.
- Press tick again to pair. The MESH symbol flashes.
- Wait for the MESH symbol to stay on. That means the thermostat has joined the hub.
- Add Another for the next room, or Finish. You can add more later from Zones, Edit, Add Zone.
Start with the thermostat nearest the hub and work outwards. The neo system is a mesh network: each mains-powered neo device passes on signals for the others, so thermostats close to the hub help the far ones join. A neoPlug also acts as a repeater, which can help a garden room or a far end of the house.
Battery neoAir thermostats need the hub as well, unless you use a neoHub Mini. They pair from their own Power Pair button, and on a wireless UFH system they also pair to the UH8-RF wiring centre that switches the actuators.
How do you connect Heatmiser neo to Alexa?
Enable the Heatmiser Neo Smart Home skill in the Alexa app, sign in with your neo account, then discover devices. Heatmiser's steps are:
- Open the Alexa app and go to Skills.
- Search for the Heatmiser Neo Smart Home skill and enable it.
- Log in with your Heatmiser neo account details.
- If you have more than one location in the neoApp, pick the one to link.
- Run device discovery.
- Put each neo device into a room you have set up in the Alexa app.
Then you can say things like "Alexa, set the temperature in my living room to 23 degrees" or "Alexa, set the living room thermostat to off". You can also group rooms and add neo thermostats to Alexa routines, such as a goodnight routine that lowers the temperature and switches off a neoPlug.
Two limits to know. You must be the master owner of the neo account, because shared users cannot link the skill. And the skill supports English (US and UK) only.
How do you connect Heatmiser neo to Google Home?
Link the Heatmiser Neo service in the Google Home app, sign in, and assign each thermostat to a room. Google moves its menus from time to time, but the route is:
- Open the Google Home app and tap Add, then Device.
- Choose the option to work with Google or link an app or service, then search for Heatmiser Neo.
- Sign in with your Heatmiser neo account.
- If you have more than one home in neo, choose the right location.
- Select each device and choose the room it is in, then tap Done.
Heatmiser's own example commands include "OK Google, set the temperature in the living room to 23 degrees", "OK Google, turn off all thermostats" and "OK Google, what's the temperature in the kitchen?". As with Alexa, only the master owner can link Google Home, not a shared user. If sign-in fails, check you are using your neo app login, not your Google password, and reset the neo password if needed.
Does Heatmiser neo work with Apple Home and Siri?
Yes, through the neoHub. In the neoApp, go to Settings and choose HomeKit and Siri, create or choose a home, add the neoHub as a new accessory, then scan the HomeKit code on the back of the hub. Assign each thermostat to a room and give it a name Siri will recognise. To control it away from home, Apple needs a home hub, such as an Apple TV or iPad set up for that job. The neoStat WiFi also supports Apple HomeKit on its own.
What if a neoStat or the neoHub will not pair?
Most pairing problems come down to the network or the order of pairing. Work through these in turn:
- App cannot find the hub: check the phone is on the router's WiFi, turn off 4G, and make sure the hub is plugged into the router itself.
- Link light not green: the hub has not reached the Heatmiser server. Check the cable and that the router has internet.
- Far thermostat will not join: pair the nearest thermostats first so the mesh can reach it, or add a neoPlug part way.
- Thermostat was paired before: reset the thermostat, then choose Add Zone and pair again.
- Wrong product: a neoStat WiFi has a WiFi sticker near the bottom screw and does not pair to the hub. Add it as its own location.
- Starting again: hold the hub's reset button for 15 seconds until the power light flashes and allow about 5 minutes. This erases every paired device, so you will need to pair them all again.
Design your UFH system yourself in 3 minutes with MaxHeatUFH ProLoop and get an instant quick design and quote. Start your design
Frequently asked questions
Do I need a neoHub for Heatmiser smart thermostats?
For app and voice control of neoStat and neoAir thermostats, yes. The neoStat WiFi is the exception: it connects to your router directly and does not work with the neoHub.
Can the neoHub connect over WiFi?
No. The neoHub connects to the router by Ethernet cable. The thermostats then talk to the hub wirelessly over the neo mesh.
How many thermostats can one neoHub run?
Up to 32 neo devices, including thermostats, neoPlugs and other compatible neo products.
Why can my partner not link Alexa or Google Home?
Only the master owner of the neo account can link Alexa or Google Home. Shared users can use the neoApp but cannot link voice assistants.
Can I control underfloor heating and hot water from the same app?
Yes. A neoStat-HW pairs to the same neoHub, so heating zones and hot water appear together in the neoApp.
Will my older neoStats work with the neoHub G3?
Heatmiser lists the neoStat, neoStat-HW, neoStat 12V, neoAir V2 and V3, neoStat-e, neoStat-HC and neoPlug as compatible. Check the label on older thermostats, then reset and re-pair them to the new hub.
Does Heatmiser neo work with IFTTT?
Yes. The neoHub supports IFTTT, so you can link your heating to other smart home devices and services.
Sources: Heatmiser neoHub Gen3 manual, Heatmiser neoHub product page, Heatmiser: how do I pair my neoHub, Heatmiser: pair to neoHub, Heatmiser: if you cannot pair your neoStat, Heatmiser: setting up the Alexa skill, Heatmiser: Alexa smart home, Heatmiser: Google Home user guide, Heatmiser: Google Home
Products in this guide
Watch how each part works and how to fit it, and download its data sheet and install manual.



Every data sheet and manual: Product Library · All videos: MaxHeatUFH on YouTube

Design it in MaxHeatUFH ProLoop
Add your rooms, choose screed, overlay, joisted or electric, and get a free quick design and full kit list with prices.


